Pickup Page

Picking Up Samples
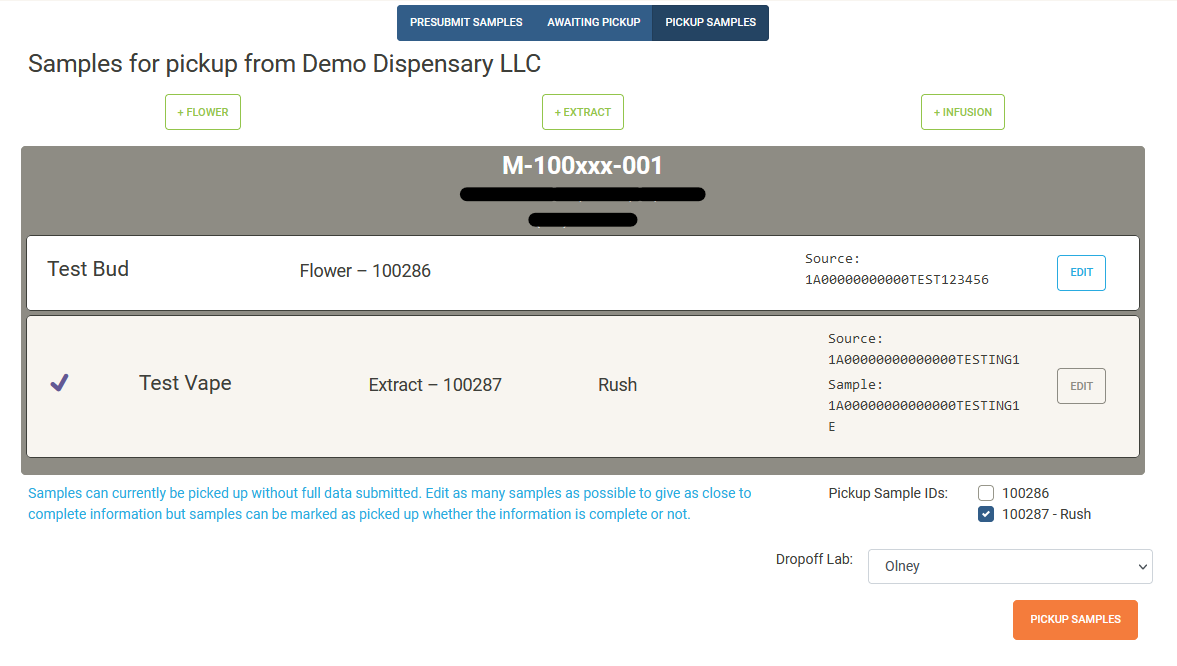
Samples created for a particular client will show in their sample queue. Staff users must finish filling out
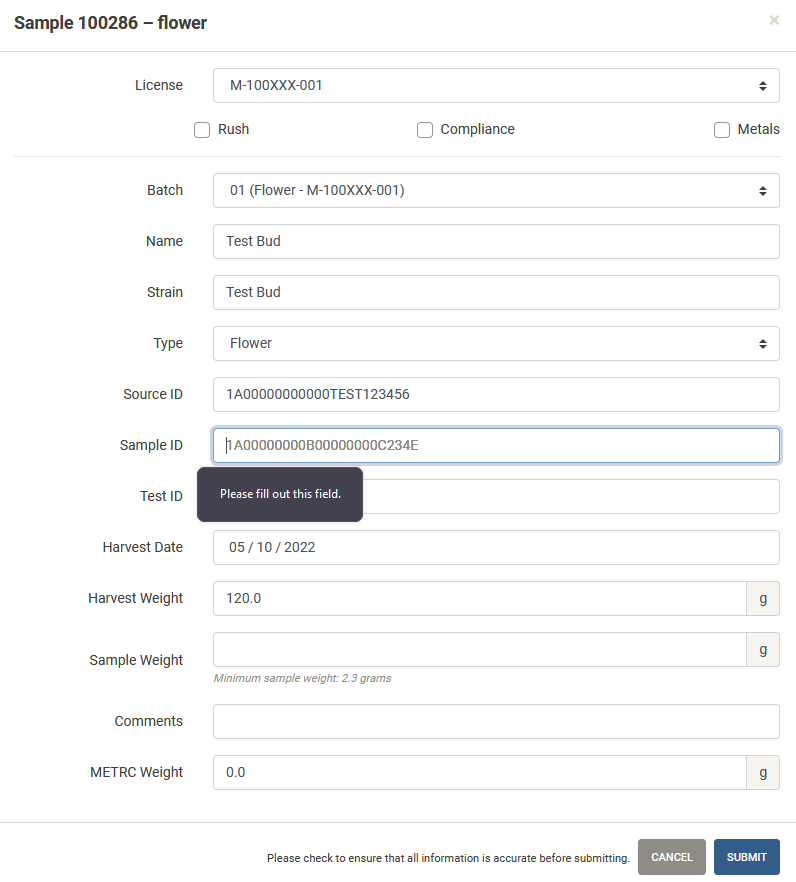
the required pickup information for each sample before they are ready for pickup. Click the Edit button next
to the sample that is required for a pickup to finish filling out all required fields such as the Sample ID and
Sample Weight fields that will not show up in the Presubmit page. Once all required samples for the pickup
are approved, ensure their checkmark is selected, select the correct dropoff lab, and then click the Pickup Samples
button. This will take you to the contract page for finalizing the sample and order details.
Click here to see more about the Contract page.
Samples that are approved for pickup will show a checkmark on the left side of the sample field. ✔
Note that samples that are
Rushand non-Rushare not allowed in the same pickup order.
Example Edit Sample Window

Pickup Navigation
At the top of the Pickup page, there is a navigation bar to easily transition to see samples
that are awaiting pickup or enter samples via the Presubmit page.
Navigating to the Awaiting Pickup page allows client users or staff users to see samples that were submitted for
pickup. It will also allow for deletion of samples in the pickup queue.
Click here to see more about the Awaiting Pickup page.
Navigating to the Presubmit page allows client and staff users to submit samples for pickup for the indicated client.
Click here to see more about the Presubmit page.